 Save to Pinterest
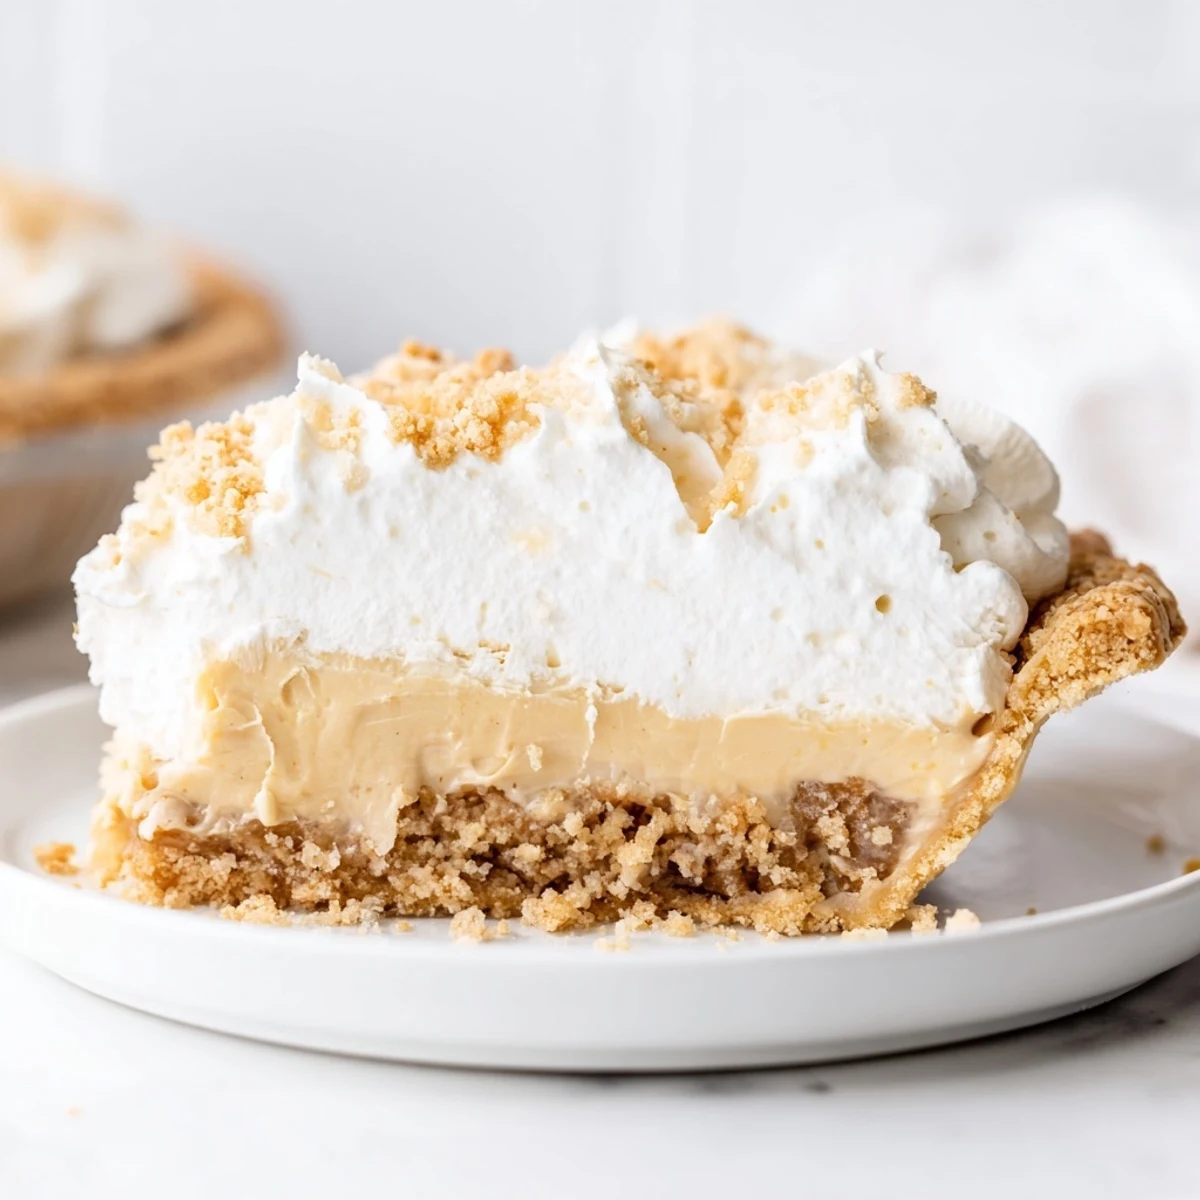
 This old-fashioned Amish peanut butter dream pie combines a rich, velvety filling with layers of crunchy peanut butter crumbs and freshly whipped cream. The creamy custard-based filling gets its silky texture from whole milk and egg yolks, while the sweet peanut butter crumble adds delightful texture throughout. A crisp pie shell holds everything together, creating a perfect balance of smooth and crunchy elements that defines traditional Amish baking.
What makes this dessert special is the triple-layer approach: bottom peanut butter crumbs, creamy vanilla-infused peanut butter filling, and a cloud-like whipped cream topping crowned with remaining crumbs. The result is an indulgent, nostalgic treat that feels like home.
The first time I encountered this pie was at a roadside Amish bakery in Lancaster County, where the baker told me she makes three dozen every Saturday and they always sell out by noon. I watched her fold the peanut butter mixture with the same practiced ease my grandmother used when making her famous meringues, her hands moving in rhythm with the ceiling fans turning overhead. Something about the way she described the recipe as 'simple as sunshine' made me realize this wasn't just a dessert—it was a piece of kitchen wisdom passed down through generations of women who understood that comfort food needs neither complication nor apology.
Last summer, my neighbor June stopped by with fresh tomatoes from her garden and caught me midway through assembling this pie. She stood watching as I sprinkled the remaining crumbs on top and said 'my mother made something like this for church suppers' before insisting we slice into it right then instead of waiting for it to fully chill. We ate it on the back porch with the humidity rising around us, and she told me about growing up in Indiana where pie was the currency of friendship and everyone had their version of the recipe that 'put tears in your eyes.'
Ingredients
- 1 9-inch prepared pie crust: Using a store-bought crust here keeps things simple, but if you are feeling ambitious, a homemade graham cracker crust adds extra buttery depth
- 3/4 cup creamy peanut butter: The creamy variety melts into the powdered sugar beautifully, creating those signature sandy crumbs
- 1 cup powdered sugar: This sweetens the peanut butter without adding graininess, and helps achieve that perfect crumbly texture
- 2/3 cup granulated sugar: Balances the natural peanut butter richness in the custard filling
- 1/3 cup all-purpose flour: Essential for thickening the custard base to just the right consistency
- 1/4 teaspoon salt: A tiny pinch that makes all the peanut butter flavors pop forward
- 2 cups whole milk: The fat content here creates a velvety custard that mimics traditional Amish cream fillings
- 3 large egg yolks: These enrich the filling and help it set into that gorgeous glossy finish
- 1 teaspoon pure vanilla extract: Rounds out all the flavors and adds that classic baked-good warmth
- 2 tablespoons unsalted butter: Stirred in at the end, this gives the filling an impossibly smooth finish
- 1 cup heavy whipping cream: Whipped to stiff peaks, this creates the cloud-like topping the pie is famous for
- 2 tablespoons powdered sugar: Just enough sweetener to stabilize the whipped cream without making it cloying
- 1/2 teaspoon vanilla extract: Echoes the vanilla in the filling for cohesive flavor throughout
Instructions
- Make the magic crumbs:
- Using a fork, work the creamy peanut butter and powdered sugar together in a medium bowl until the mixture transforms into sandy, crumbly bits that hold together when pressed
- Layer the bottom:
- Spread exactly half of those peanut butter crumbs evenly across the bottom of your baked and cooled pie crust
- Start the custard base:
- In a saucepan, whisk together the granulated sugar, flour, and salt until they are one uniform mixture, then gradually pour in the milk while whisking to prevent any lumps from forming
- Cook until thickened:
- Set the pan over medium heat and whisk without stopping until the mixture bubbles gently and thickens enough to coat the back of a spoon, about 4 to 5 minutes
- Temper the eggs:
- In a separate bowl, whisk your egg yolks until they are pale and slightly thickened, then slowly pour in about a half cup of the hot milk mixture while whisking vigorously
- Complete the filling:
- Pour the warmed egg mixture back into the saucepan, whisking constantly, and cook for another 2 minutes until the filling becomes glossy and thick enough to hold its shape
- Add the finishing touches:
- Remove the pan from heat completely, then stir in the butter and vanilla until the butter melts completely and the filling looks impossibly smooth
- Assemble and chill:
- Pour the warm filling over the peanut butter crumbs in your crust, let it cool for 15 minutes on the counter, then refrigerate for at least 2 hours until completely set
- Prepare the topping:
- Beat the heavy cream with the powdered sugar and vanilla until stiff peaks form, creating clouds of cream that will hold their shape beautifully
- Finish and serve:
- Spread the whipped cream over your chilled pie and sprinkle with the remaining peanut butter crumbs just before slicing
 Save to Pinterest
 My daughter requested this for her eighth birthday instead of cake, and watching her face light up when she took that first bite—crunchy creamy sweet all at once—reminded me why simple recipes often become the ones we return to again and again. Now whenever I make it, the smell of peanut butter and vanilla takes me back to that kitchen in Lancaster County where a baker taught me that some of the best desserts come from the most humble ingredients.
Making It Ahead
This pie actually benefits from being made a day ahead, giving all the flavors time to meld together and the filling time to set perfectly. I have kept it in the refrigerator for up to three days, though the whipped cream topping starts to lose its volume after 48 hours.
Serving Suggestions
The pie needs to be thoroughly chilled to slice cleanly, so plan to take it out of the refrigerator just 10 minutes before serving. A hot cup of coffee or a cold glass of milk alongside creates that perfect balance of temperatures and flavors.
Getting Creative
While the traditional recipe is perfect as is, I have learned that sometimes the smallest changes can create something entirely new while still honoring the original spirit of the dish.
- Drizzle melted chocolate over the top for a peanut butter cup variation
- Press crushed graham crackers into the crust for extra texture
- Fold chopped salted peanuts into the whipped cream for a salty crunch
 Save to Pinterest
 There is something deeply satisfying about a recipe that has stood the test of time in Amish kitchens, finding its way into our modern lives with all its creamy, crumbly glory intact. May this pie bring as much comfort to your table as it has to mine.
Recipe FAQs
- → What makes Amish peanut butter dream pie different from regular peanut butter pie?
-
Amish peanut butter dream pie features a unique custard-based filling made with milk and egg yolks, creating a velvety texture distinct from the cream cheese or whipped cream bases found in other versions. The addition of layered peanut butter crumbs throughout adds extra richness and traditional Amish baking character.
- → How long should I chill the pie before serving?
-
Refrigerate the pie for at least 2 hours after pouring the filling to ensure it sets completely. This chilling time allows the custard to firm up properly, making clean slices easier. For best results, prepare it the night before serving—the flavors develop beautifully overnight.
- → Can I use natural peanut butter instead of creamy?
-
Creamy peanut butter works best because it contains stabilizers that help maintain the crumbly texture needed for the peanut butter crumb layers. Natural peanut butter tends to separate and become oily, which may affect both texture and consistency. Stick with standard creamy peanut butter for authentic results.
- → What's the purpose of tempering the egg yolks?
-
Tempering gradually warms the egg yolks with hot liquid before adding them to the saucepan, preventing the eggs from scrambling and creating a smooth, glossy custard. This technique ensures your filling remains silky and lump-free while properly cooking the eggs for food safety.
- → Can I make this pie ahead of time?
-
Absolutely. This pie actually improves when made a day ahead—the flavors meld together beautifully, and the texture becomes more firm. Store it covered in the refrigerator for up to 3 days. Add the final topping of peanut butter crumbs just before serving to maintain their crunchiness.
- → What crust works best with this filling?
-
A traditional baked pie crust provides a sturdy base that contrasts nicely with the creamy filling. For added flavor, consider a homemade graham cracker or shortbread crust. Both complement the peanut butter flavor while adding subtle sweetness and texture variations to each bite.
