 Save to Pinterest
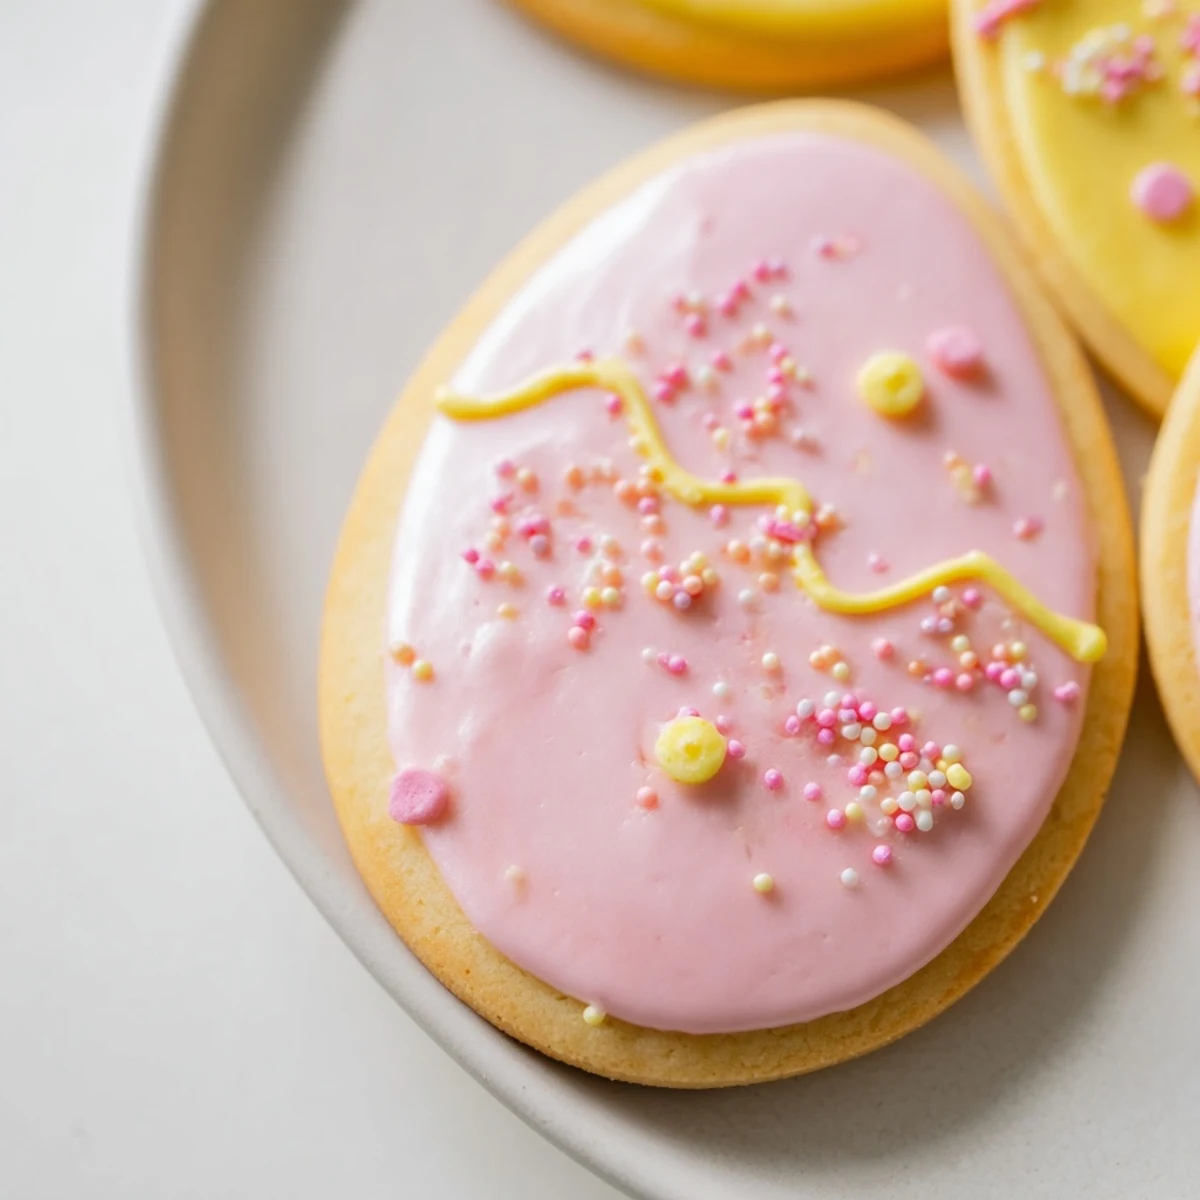
 These light, buttery sugar cookies capture the essence of spring with delicate pastel icing and festive Easter shapes. The dough comes together quickly with pantry staples, then chills for easy rolling and cutting. After baking until just golden, the cookies are adorned with smooth royal icing in soft pinks, yellows, greens, and purples. Perfect for Easter brunch, spring parties, or holiday gift-giving, these decorated treats are both visually stunning and deliciously satisfying.
My daughter woke up last Easter morning declaring we needed cookies that looked like a garden party threw up on them in the best possible way. We ended up covered in flour and pastel food coloring by 9 AM, my kitchen looked like a craft store exploded, and those cookies disappeared faster than anyones ever seen sugar vanish before. Now its not Easter unless theres a drying rack full of bunnies and eggs somewhere in my house.
Last year my neighbor kids came over to help decorate and lets just say my kitchen floor looked like a confetti factory after a hurricane. The purple icing ended up everywhere except the actual cookies, and somehow one bunny got pink eyebrows. Every time I bite into a lemon version now I think of three tiny humans arguing over whose flower cookie was the prettiest.
Ingredients
- 2 1/4 cups all-purpose flour: This creates a tender cookie that holds its shape during baking without spreading into unrecognizable blobs
- 1/2 teaspoon baking powder: Just enough lift to give the cookies a slight puff without making them cakey or dry
- 1/4 teaspoon salt: Balances the sweetness and makes all the flavors pop instead of tasting like straight sugar
- 3/4 cup unsalted butter at room temperature: Cold butter wont cream properly and melted butter makes greasy cookies so room temp is non negotiable here
- 3/4 cup granulated sugar: Creates a crisp edge while keeping the center soft and chewy
- 1 large egg: Binds everything together and adds structure so the cookies dont crumble when you bite them
- 2 teaspoons pure vanilla extract: Dont skimp here because vanilla is the backbone flavor that makes these taste like home
- 1/4 teaspoon almond extract optional: Adds that classic sugar cookie bakery flavor but skip if anyone has nut allergies
- 2 cups powdered sugar: The base for royal icing that dries hard and glossy perfect for stacking and storing
- 1 1/2 tablespoons meringue powder: This is the secret to icing that actually sets instead of staying sticky forever
- 3 to 4 tablespoons water: Start with less and add more until you reach the right consistency like thick honey
- Pastel gel food coloring: Gel colors give you vibrant shades without thinning out your icing like liquid drops do
- Assorted Easter themed sprinkles optional: Because everything is better with edible glitter and tiny bunny shaped confetti
Instructions
- Whisk your dry ingredients together:
- In a medium bowl combine the flour baking powder and salt until everything is evenly distributed so you dont bite into a salty pocket later
- Cream butter and sugar until fluffy:
- Beat the butter and sugar on medium high speed for 2 to 3 minutes until the mixture turns pale yellow and feels like whipped cream
- Add the egg and extracts:
- Crack in the egg pour in the vanilla and almond extract and beat until the mixture looks smooth and glossy
- Combine everything gently:
- Slowly mix in the dry ingredients on low speed just until you cant see flour anymore over mixing makes tough cookies
- Chill the dough:
- Divide the dough in half shape into flat disks wrap tightly and refrigerate for at least one hour this prevents the cookies from spreading into weird shapes
- Get your oven ready:
- Preheat to 350 degrees F and line your baking sheets with parchment paper so nothing sticks and cleanup is minimal
- Roll and cut your shapes:
- On a floured surface roll the dough to quarter inch thickness and cut out your Easter shapes leaving at least an inch between them on the baking sheet
- Bake until just golden:
- Bake for 9 to 11 minutes watching for the slightest hint of browning around the edges then cool completely on a wire rack
- Make your royal icing:
- Mix powdered sugar meringue powder and water until smooth and glossy adjusting with more water or sugar until it flows like thick honey
- Color and decorate:
- Divide the icing into small bowls tint with pastel colors and decorate your cooled cookies adding sprinkles before the icing sets
 Save to Pinterest
 My mom used to make these every Easter weekend when I was growing up and shed always hide one extra cookie for me to find like a little edible treasure hunt. Last year I carried on the tradition and my daughter actually shrieked with joy when she discovered her hidden cookie behind the fruit bowl. Some traditions stick around because theyre too sweet to let go.
Making Your Icing The Right Consistency
The consistency test changed my entire decorating game. Drag a knife through your icing and count how many seconds it takes for the line to disappear ten seconds is perfect for outlining and flooding while fifteen seconds works better for detailed designs. I ruined three batches before someone finally taught me this trick.
Flavor Variations That Work
Lemon extract instead of almond gives these cookies a bright spring vibe that pairs perfectly with the pastel colors. Orange extract makes them taste like a creamsicle and Ive even tried coconut extract which turns them into something tropical and unexpected. Just keep the vanilla as your base and swap one teaspoon for whatever sounds good.
Storage And Make Ahead Tips
You can make the dough up to three days ahead and keep it wrapped in the fridge or freeze it for up to a month if you want to get a head start on Easter prep. Once baked and decorated these cookies actually get better after a day or two as the flavors meld together. Store them between layers of wax paper in an airtight container at room temperature.
- Undecorated baked cookies freeze beautifully for up to three months
- Decorated cookies can be frozen but the sprinkles might bleed slightly
- Always bring cookies to room temperature before serving for the best texture
 Save to Pinterest
 Theres something so satisfying about pulling out a tray of perfectly shaped cookies all lined up like little edible soldiers ready for their colorful transformation. Happy baking and may your sprinkles always land where you want them to.
Recipe FAQs
- → How long should I chill the cookie dough?
-
Chill the dough for at least 1 hour before rolling. This firms the butter, preventing cookies from spreading too much while baking and making the dough easier to handle and cut into shapes.
- → Can I make these cookies ahead of time?
-
Yes! You can prepare the dough up to 3 days in advance and store it wrapped in the refrigerator. Baked cookies (without icing) keep well in an airtight container for up to one week. Iced cookies are best within 3-4 days.
- → What's the best way to achieve smooth royal icing?
-
Mix the powdered sugar, meringue powder, and water until completely smooth and glossy. The consistency should be thick enough to hold its shape but thin enough to flow slightly. Add water one tablespoon at a time to reach your desired texture.
- → Can I use natural food coloring instead of gel?
-
Absolutely! Liquid or natural food colorings work well, though you may need slightly more to achieve vibrant pastel shades. Gel coloring is preferred because it adds less liquid to the icing, helping maintain consistency.
- → What cookie cutter shapes work best for Easter?
-
Classic Easter shapes include eggs, bunnies, chicks, carrots, lambs, and spring flowers. Simple shapes with clean edges are easiest to decorate and hold their icing details beautifully.
- → How do I prevent cookies from spreading in the oven?
-
Proper chilling is essential—don't skip the refrigerator time. Also, avoid over-softening your butter, and work with one portion of dough at a time while keeping the rest chilled. Using parchment paper helps with easy removal and prevents sticking.
