 Save to Pinterest
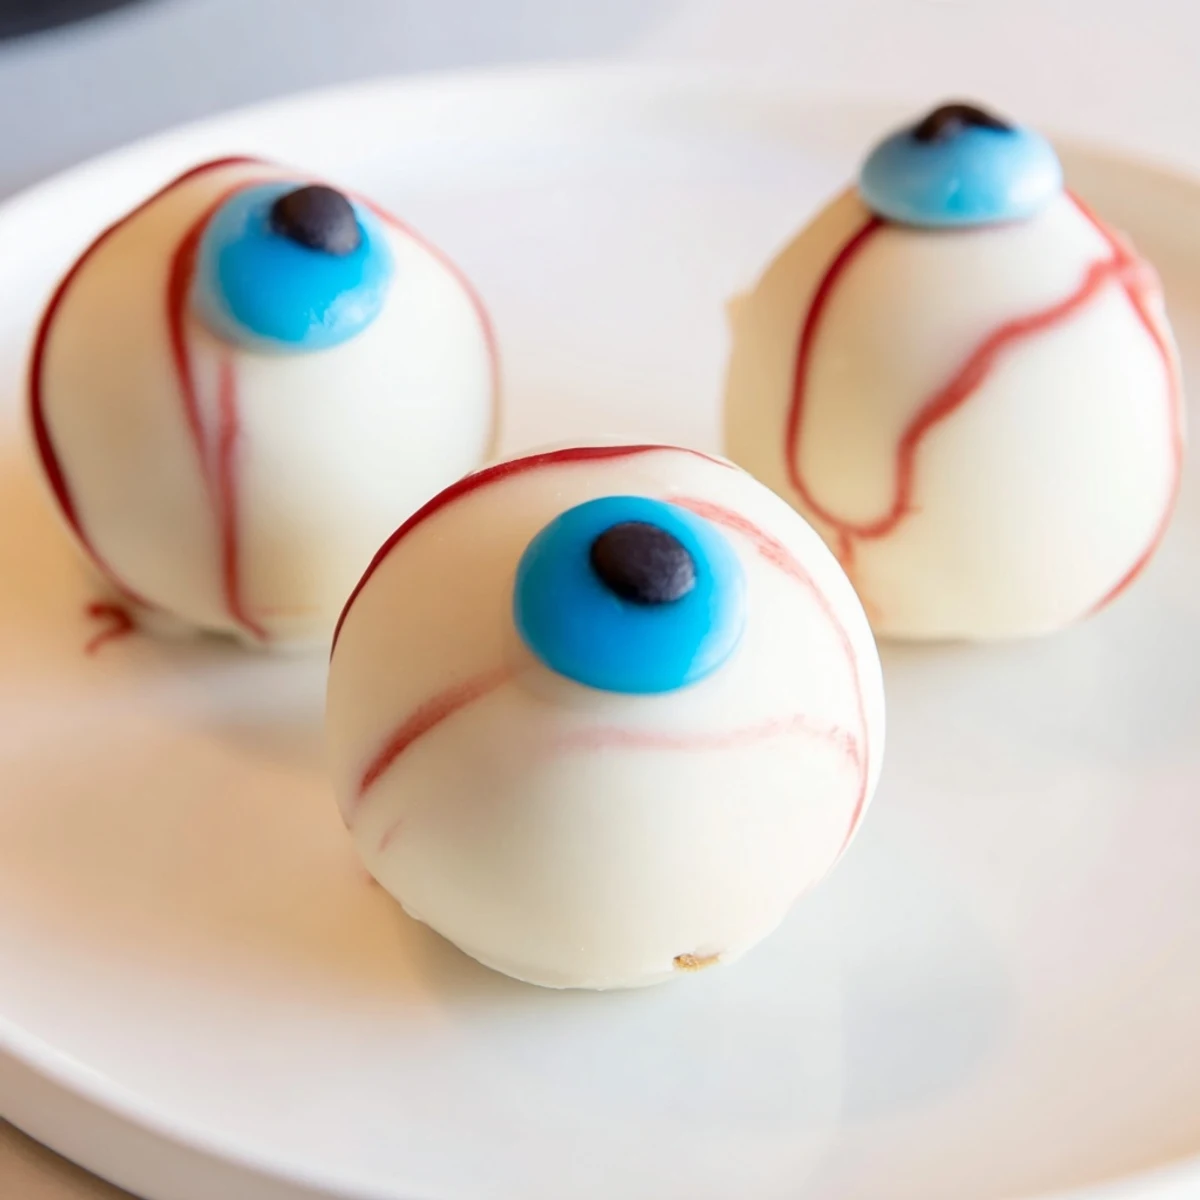
 These spooky Halloween cake eyeballs combine crumbled vanilla cake with cream cheese frosting, shaped into balls and dipped in white chocolate. Each edible eye features a colorful iris made from blue or green candy melts, a dark chocolate pupil, and red gel veins for that creepy authentic look.
The process involves baking a vanilla cake, crumbling it once cooled, and mixing with a buttercream frosting to create a moldable mixture. After chilling, the balls are coated in melted white chocolate and decorated to resemble eyeballs. The result is a festive, crowd-pleasing treat perfect for Halloween parties, school gatherings, or haunted house events.
Best served chilled for firm texture, these can be made ahead and stored in the refrigerator. For an extra surprise, add cherry jam centers for a 'bloody' effect when bitten into.
The first time I made these, my kitchen looked like a crime scene from a B horror movie, and I could not stop laughing. My daughter walked in, took one look at the red gel splattered everywhere, and immediately asked if we were sacrificing a cake to the Halloween gods. We spent the next hour drawing crooked veins and making the pupils look in different directions until we were both crying with laughter. Now it is not Halloween until someone makes a terrible joke about these being the eyes that have seen too much.
Last year I brought these to my office potluck and watched my coworker stare at the platter for five full minutes before finally grabbing one. He took the tiniest possible bite, eyes wide, then immediately reached for three more. By the end of the party people were taking selfies with them and threatening to hide them in each others desks. The best part was watching the new intern genuinely try to figure out if they were anatomically correct.
Ingredients
- 1 box vanilla cake mix: The shortcut that still delivers incredible texture, though your from-scratch recipe works beautifully too
- 3 large eggs: Room temperature eggs blend more evenly into the batter for consistent crumb structure
- 120 ml vegetable oil: Keeps the cake incredibly moist so your eyeballs are never dry or crumbly
- 240 ml water: Just enough liquid to bring the batter together without making it too thin
- 100 g cream cheese: The tangy element that cuts through all that sweet chocolate and cake
- 100 g unsalted butter: Make sure it is properly softened or your filling will have tiny lumps
- 200 g powdered sugar: Sift it first unless you want tiny sweet lumps in your mixture
- 1 tsp vanilla extract: Pure vanilla makes a noticeable difference in the final flavor profile
- 400 g white chocolate: Candy melts are actually easier to work with than real white chocolate
- 50 g dark chocolate: This creates those unnervingly realistic pupils that make people do double takes
- Colored candy melts: Blue and green give you the most natural looking irises
- Red gel food coloring: The messy part where you get to channel your inner weirdo artist
Instructions
- Bake your base:
- Preheat that oven to 180°C and bake your vanilla cake according to the package or your favorite homemade recipe. Let it cool completely because warm cake will turn your filling into a sad sticky mess.
- Create the crumble:
- Break that cooled cake into tiny crumbs until it resembles damp sand. I use my hands because it is faster and strangely satisfying to destroy a perfectly good cake.
- Make the creamy filling:
- Beat the cream cheese, butter, powdered sugar, and vanilla until you have something smooth and fluffy. Scrape down the bowl halfway through or you will find pockets of pure powdered sugar later.
- Combine everything:
- Mix the frosting into those cake crumbs until the mixture holds together when you press it. It should feel like play dough that holds its shape but is not sticky or dry.
- Form the eyeballs:
- Scoop out tablespoons and roll them into 24 balls, placing them on a parchment lined tray. Pop them in the freezer for 20 minutes because trying to dip warm, soft balls in chocolate is a nightmare nobody needs.
- Give them their white coat:
- Melt the white chocolate gently, then dip each cake ball until fully coated. Let any excess drip off before placing them back on the tray, and work quickly because the cold balls make the chocolate set fast.
- Add the colored iris:
- While that white coating is still soft, add a small circle of blue or green candy melt right in the center. Do not worry about making them perfect because real eyes are not perfectly symmetrical anyway.
- Create the pupils:
- Once the iris has set, add a tiny dot of dark chocolate right in the middle for the pupil. This is when they start looking back at you, which is mildly unsettling but also the whole point.
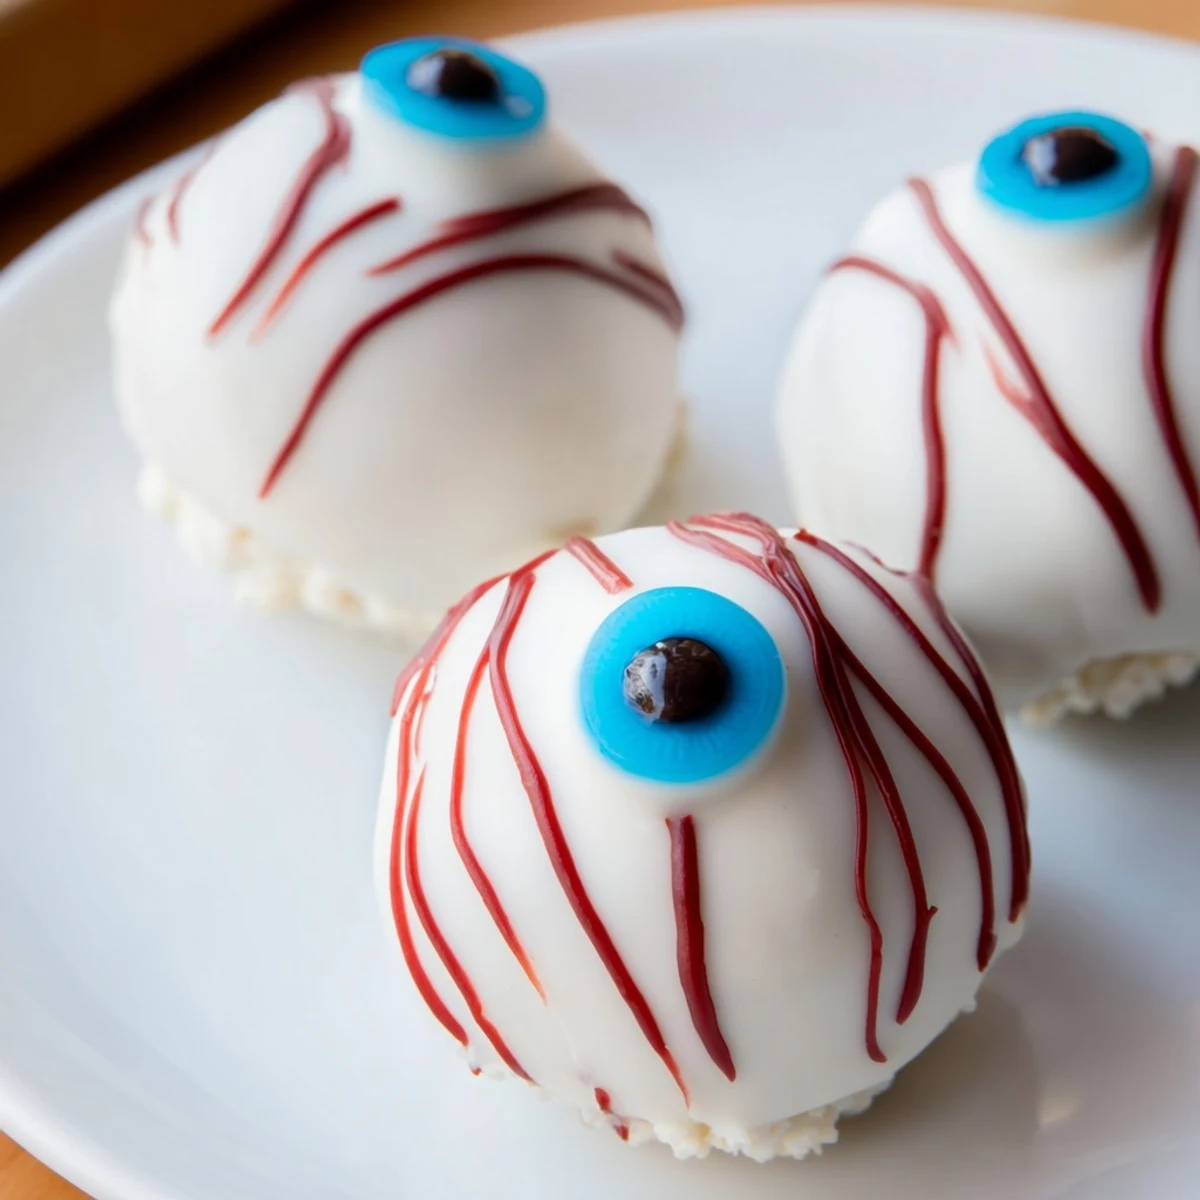
- Draw the veins:
- Use red gel to draw squiggly lines radiating from the iris toward the edge. Some should be thin, some thicker, and they do not need to match because real blood vessels are chaotic.
- Let them set completely:
- Give everything time to firm up before serving, otherwise the first person who grabs one will end up with red gel all over their fingers. Not that I learned this the hard way or anything.
 Save to Pinterest
 My niece now requests these for her birthday every year, even though it is in March, because she thinks it is hilarious to serve eyeballs at a spring party. Her friends were hesitant at first, but something about eating food that looks back at you brings out a weird competitive streak in people. Now it is a tradition, and I have accepted that I will be making vaguely threatening desserts for the foreseeable future.
Making Them Look Extra Creepy
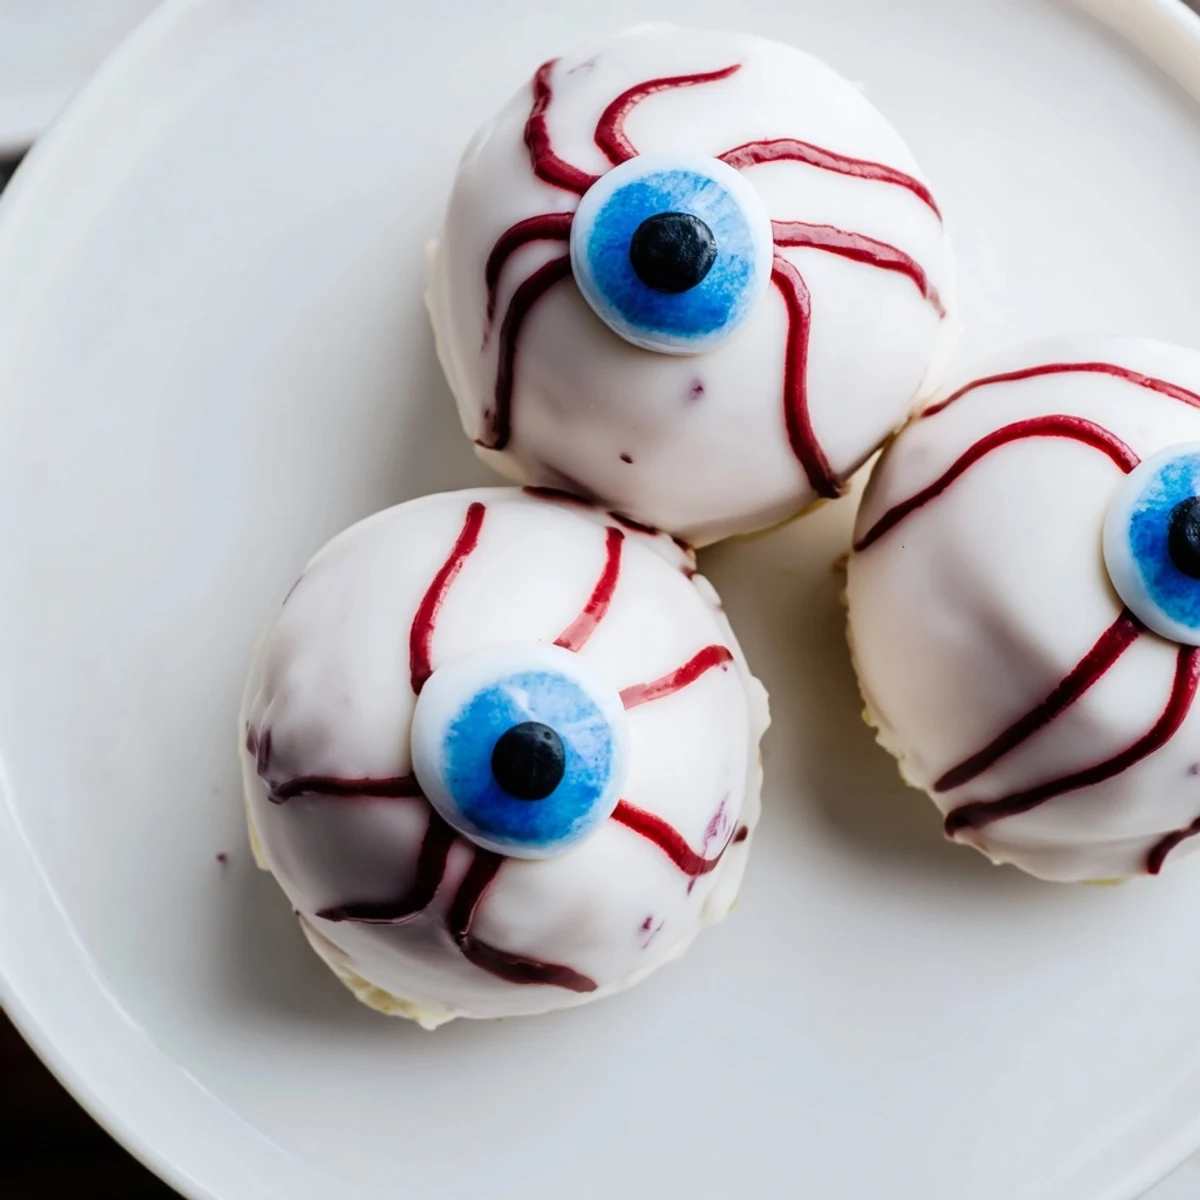
The difference between cute and genuinely unsettling is all in the details. Varied iris sizes make them look more realistic, and slightly uneven pupils give them a crazy, unhinged vibe. I have found that making some eyes look in different directions creates a much more disturbing effect than perfectly matched pairs.
Flavor Variations
While vanilla is classic, chocolate cake with a cherry center creates a bloody surprise when people bite in. Red velvet works beautifully if you want them to look bloodshot from the inside out. Just remember that darker cakes make the veins less visible, so you might want to go heavier on the red gel.
Serving And Storage
These taste best chilled because the texture becomes pleasantly dense and fudgy. They will keep in the refrigerator for up to five days, though they rarely last that long in my house. I have also frozen them for a month without any issues.
- Arrange them on a dark platter or fake cobwebs for maximum dramatic effect
- Keep them refrigerated until the moment of reveal for the best texture
- Have extra red gel on hand for touch ups because they will get smudged
 Save to Pinterest
 There is something deeply satisfying about serving food that makes people hesitate before eating, then watching their faces light up when they realize how delicious it is. Halloween only comes once a year, so we might as well commit to the bit.
Recipe FAQs
- → How far in advance can I make these Halloween cake eyeballs?
-
You can prepare these up to 3 days ahead. Store in an airtight container in the refrigerator, layered between parchment paper to prevent sticking. The chocolate coating may develop condensation when brought to room temperature, so serve chilled for best appearance.
- → Can I freeze the cake eyeballs?
-
Yes, freeze undecorated cake balls for up to 1 month. Thaw in refrigerator overnight before coating with chocolate and decorating. Once decorated with the chocolate coating and gel, they're best kept refrigerated rather than frozen as the chocolate texture may change.
- → What's the best way to melt the white chocolate without seizing?
-
Melt white chocolate in short 20-second bursts in the microwave, stirring between each interval. Alternatively, use a double boiler over gently simmering water, ensuring no water contacts the chocolate. Add 1 teaspoon of coconut oil or vegetable shortening if the coating seems too thick for dipping.
- → Can I use homemade cake instead of cake mix?
-
Absolutely. Use any 400g of vanilla cake, whether homemade from scratch or a store-bought pound cake. Brownies work too for a denser, richer version. The key is crumbling the cooled cake thoroughly into fine crumbs before mixing with frosting.
- → How do I prevent the cake balls from falling off the stick if I use them?
-
Dip the tip of each stick into melted white chocolate first, then insert halfway into the chilled cake ball. Let set for 5 minutes before dipping the entire ball. This creates a secure anchor. Always keep the balls chilled until ready to dip to maintain their shape.
- → What alternatives work for the red veins if I don't have decorating gel?
-
You can use red food coloring mixed with a drop of corn syrup, or thin red royal icing. Alternatively, melt red candy melts and use a toothpick to draw delicate veins. Even pomegranate or raspberry reduced to a syrup consistency can create realistic vein effects.
