 Save to Pinterest
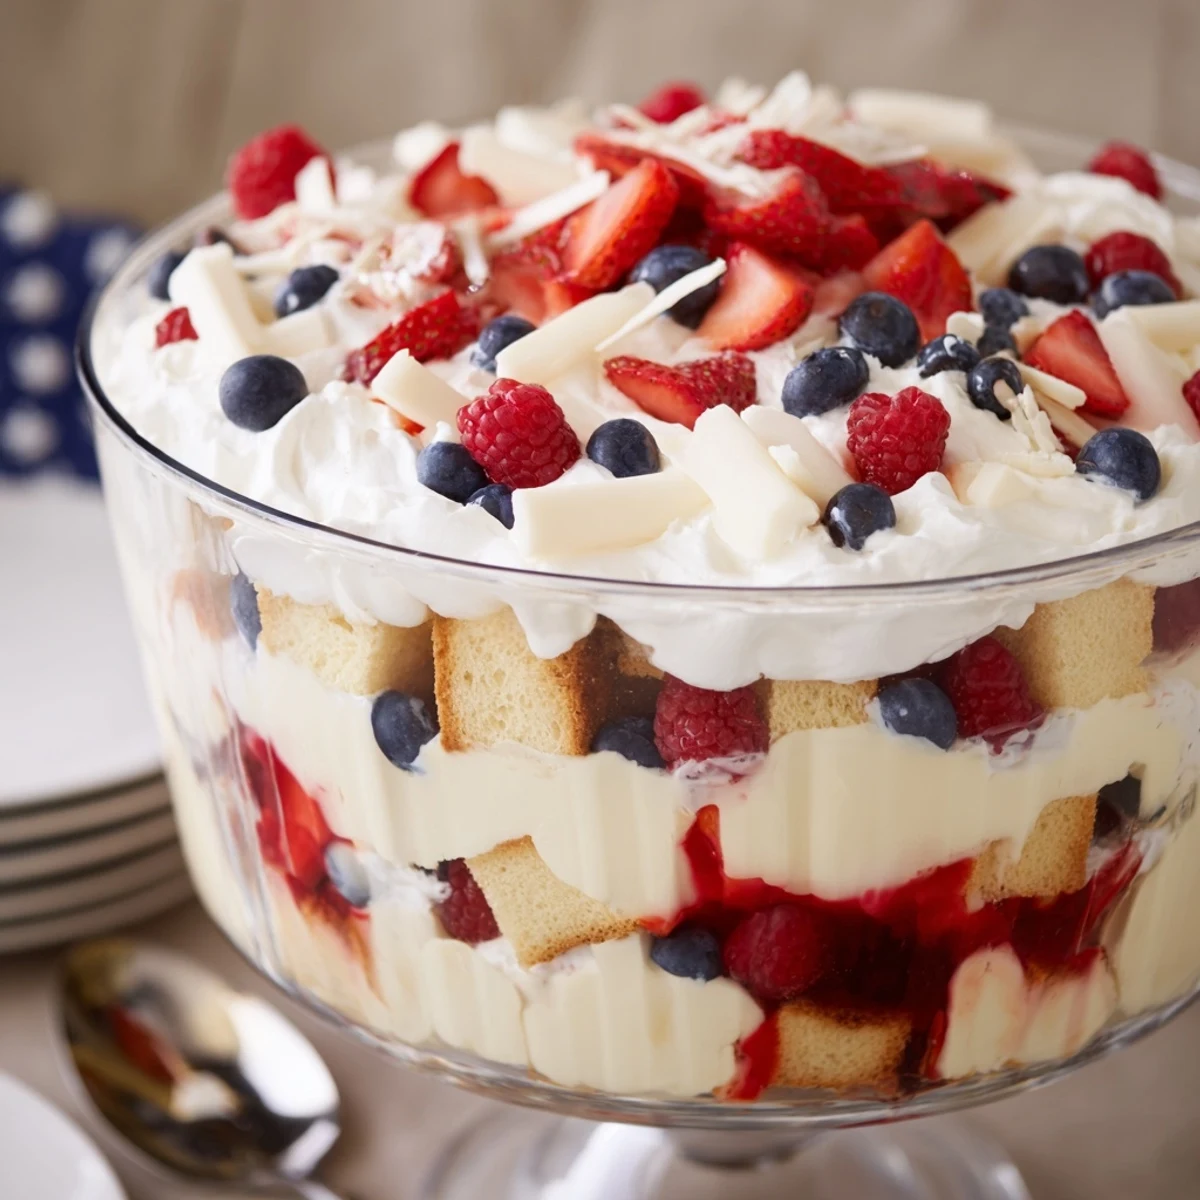
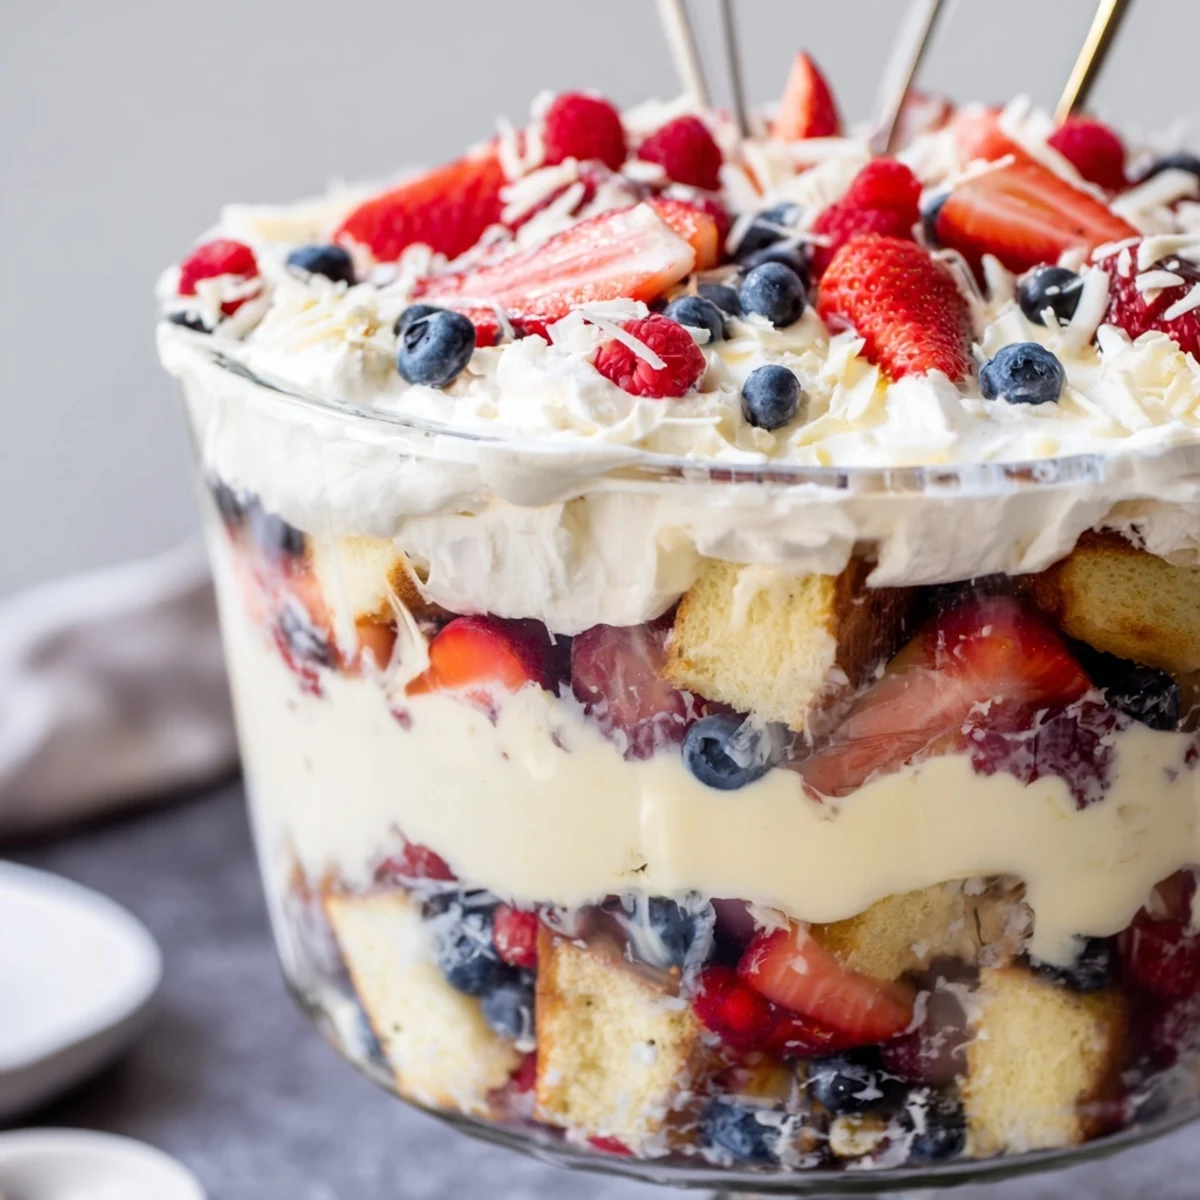
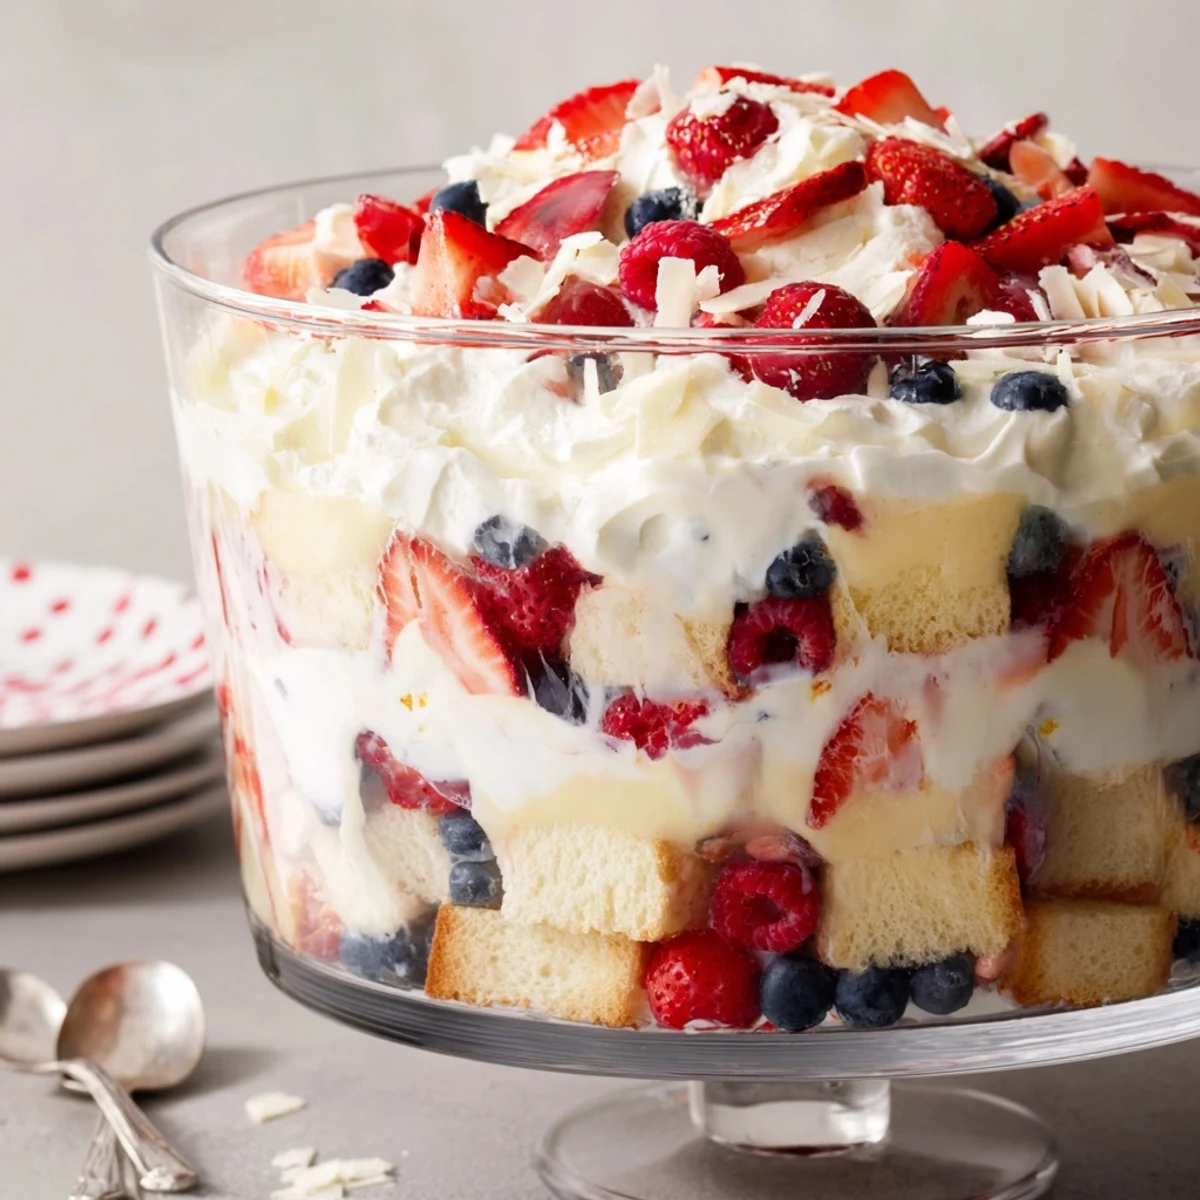
 This trifle stacks cubed pound cake with quick-set vanilla pudding, freshly whipped cream and a trio of berries for a vibrant, crowd-friendly summer centerpiece. Whip cream to stiff peaks, prepare the instant pudding, then layer cake, pudding, cream and fruit in a clear bowl. Chill at least 2 hours so textures meld. Swap thawed frozen berries, add a splash of berry liqueur, or use yogurt for a lighter finish.
The first time I made this Red White and Blue Trifle, the sound of fireworks outside seemed to echo the bright berries layered in my bowl. I never expected assembling cake and cream could transform my kitchen into a celebration, but each spoonful felt like a parade of flavors. The process is quick, leaving plenty of time to laugh and chat with friends or wrangle picnic essentials. There's just something about the colors that shifts a simple dessert into an instant centerpiece.
On a humid July afternoon, I whisked the pudding while my nephew kept sneaking berries from the bowl, turning assembly into a team effort. We layered as quickly as we could to avoid eating half the ingredients before the trifle made it to the table. Once finished, I caught my sister snapping a picture before anyone was allowed to dig in—a true sign that a recipe is a hit. That day, dessert was devoured long before the grill even cooled.
Ingredients
- Pound Cake or Angel Food Cake: Dense, buttery pound cake adds sturdy layers and soaks up the creamy fillings; cube it evenly for the perfect bite in every scoop.
- Fresh Strawberries: Slice them to fan beautifully, adding juicy sweetness and the signature red color; pat them dry to avoid soggy layers.
- Fresh Blueberries: Their burst of tartness contrasts perfectly with the vanilla pudding and cream, and they hold up well even if the trifle sits overnight.
- Fresh Raspberries: Soft, tangy, and bright; scatter them gently to prevent crushing, and use extra for a jewel-like garnish.
- Cold Whole or 2% Milk: The chill speeds up the pudding set and keeps everything light—avoid skim milk, which results in runny layers.
- Instant Vanilla Pudding Mix: Silky-smooth and foolproof; choose high-quality brands for a richer vanilla flavor.
- Heavy Whipping Cream: Whips up fluffy and decadent, forming indulgent clouds between the cake and fruit; chill the bowl and beaters to help it set fast.
- Powdered Sugar: Sweetens the cream without grittiness; sift it in for lump-free bliss.
- Vanilla Extract: A splash upgrades the cream and highlights all the other flavors.
- Extra Berries: Scatter boldly for a showstopping finish that looks as good as it tastes.
- White Chocolate Shavings (optional): These add a subtle, creamy elegance on top—shave from a block with a vegetable peeler for pretty curls.
Instructions
- Pudding Prep:
- Whisk cold milk and instant vanilla pudding mix for two minutes until it thickens, then let it stand for five more to become luxuriously velvety.
- Whip the Cream:
- In a chilled bowl, beat the heavy cream with powdered sugar and vanilla until it holds peaks and looks pillowy—don’t walk away, it can go from soft to stiff quickly.
- Layer the Cake:
- Spread half the pound cake cubes at the bottom of your glass bowl, nestling them into an even layer—some might sneak one or two bites, and that’s okay.
- Add Pudding and Cream:
- Spoon one-third of the pudding over the cake, smoothing right to the edges, then add one-third of the whipped cream for dramatic, cloudlike layers.
- Berries, Please:
- Scatter half the strawberries and blueberries atop the cream, letting the colors peek through the glass.
- Repeat and Build:
- Layer on the rest of the cake, a second round of pudding and cream, followed by the raspberries and remaining berries—finish with the last of the pudding and swoop the rest of the whipped cream on top.
- Final Flourish:
- Crown the trifle with a mix of extra berries and, if you fancy, a drift of white chocolate shavings for a sparkling touch.
- Chill and Serve:
- Let the whole creation chill in the fridge for at least two hours so flavors mingle and the cake softens, making that first scoop totally dreamy.
 Save to Pinterest
 When a friend called to say she was bringing extra guests, I didn’t stress because there was always a bit more trifle at the bottom of the bowl—enough for just one more helping and a lot of cheerful, sticky-fingered memories. Watching everyone sneak back to scrape the last bit felt like the best compliment a cook could earn.
The Joy of Effortless Entertaining
This trifle is my go-to when I want maximum wow factor with minimal fuss, especially when last-minute plans pop up. Layering everything in a glass bowl feels almost like painting, and the colorful stripes do half the decorating for you. The whole kitchen smells like vanilla and summer by the time I’m done, which is a reward in itself.
Making It Your Own
I love that this recipe lets you play—swap in peaches, blackberries, or any fruit you have on hand. Once, when strawberries were nearly out of season, I tossed in cherries and they disappeared just as quickly. If you prefer a tangier touch, lemon zest sprinkled between layers is a bright surprise.
Serving and Storage Tricks
I’ve learned the hard way not to assemble too early—make it the day you serve, and it’s always freshest and prettiest. If you have leftovers, tuck a piece of plastic wrap right against the surface to keep the cream from absorbing fridge smells. You can scoop little parfaits into glasses to stretch leftovers into something new and fun.
- Keep any extras chilled and eat within 24 hours for best flavor.
- Prep all the layers before guests arrive so assembly is a breeze.
- Don’t forget to press each layer gently for sharp, stripey lines in the bowl.
 Save to Pinterest
 I hope you get to share this Red White and Blue Trifle with a crowded table and a happy heart—just don’t expect any leftovers. Each spoonful always seems to spark a little more celebration.
Recipe FAQs
- → Can I use frozen berries?
-
Yes—thaw fully and drain before using to avoid excess moisture. Pat dry with paper towels and fold into layers sparingly to keep the trifle from becoming soggy.
- → What cake works best?
-
Pound cake or angel food cake are ideal for absorbent, sturdy layers; day-old cake soaks flavors nicely without collapsing. Cut into 1-inch cubes for even layering.
- → How far ahead should I assemble it?
-
Assemble at least 2 hours before serving to let flavors meld. For best texture, assemble up to 24 hours ahead; beyond that the cake may become too soft.
- → How can I lighten the final dish?
-
Swap heavy cream for a light whipped cream alternative or plain vanilla yogurt, and choose a lighter pound cake or sliced angel food for fewer calories while maintaining structure.
- → How do I prevent a watery layer?
-
Use chilled pudding that has set, fully drain thawed fruit, and whip the cream to stiff peaks so it holds shape. Layering cake first can also help absorb juices without pooling.
- → Any garnish ideas?
-
Top with extra fresh berries and a sprinkle of white chocolate shavings or finely chopped mint for color and a hint of contrast that complements the fruit layers.
